Creating Payment Schedules from Accounts
What does creating payment schedule helps in? Creating a payment schedule helps in ensuring timely income collection and better financial management.
Creating Payment Schedules
This tutorial walks you through the process of creating payment schedules in the OZIAgent system, ensuring timely and organized payment tracking.
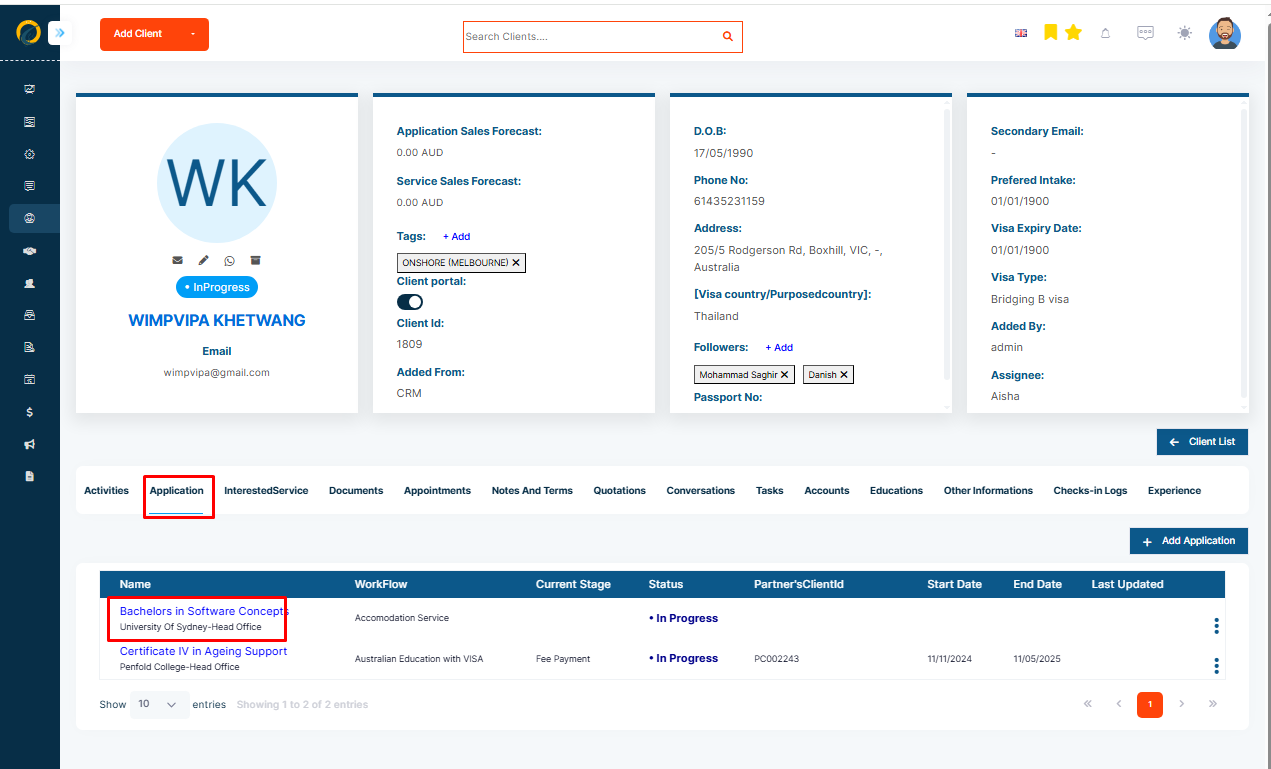
Step 1: Go to the Client Profile page and Click on the Application tab.
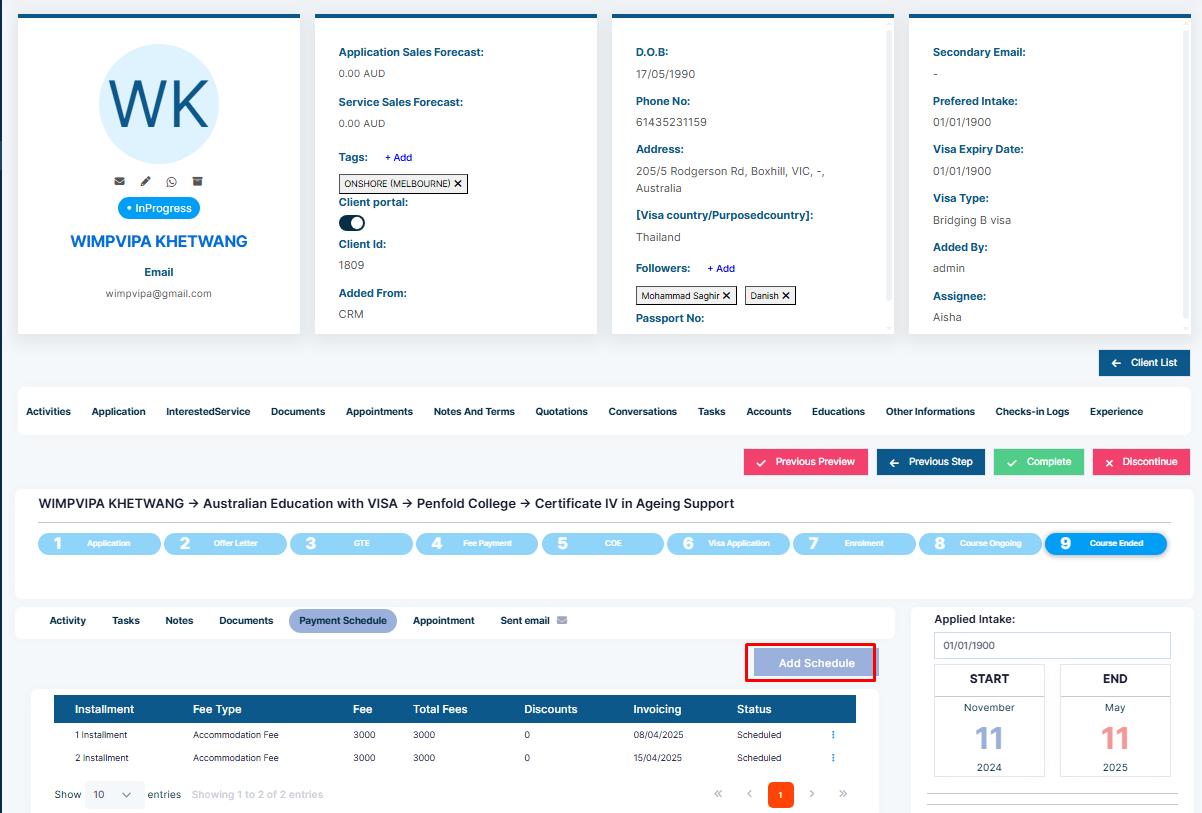
Step 2: Schedule a new invoice by clicking on Add Payment Schedule.
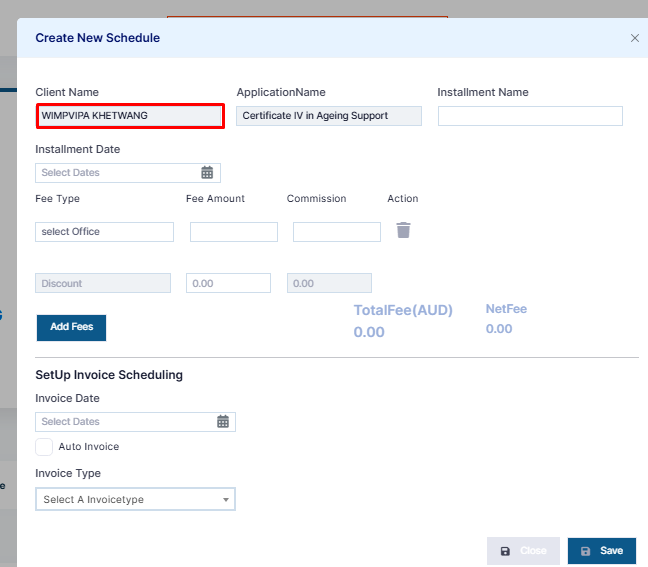
Step 3: The Client Name will be selected by default.
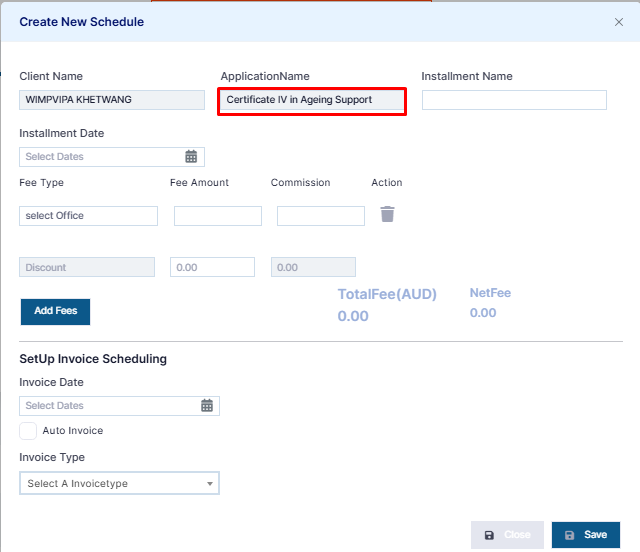
Step 4: The Application will also be selected by default.
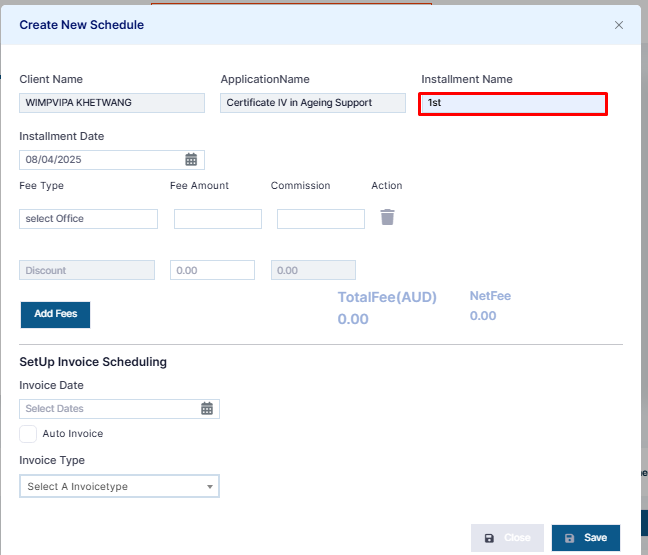
Step 5: Give the invoice schedule a suitable Name.
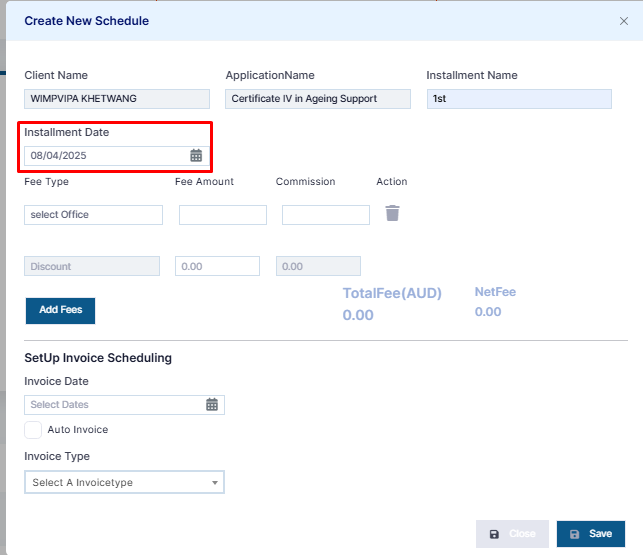
Step 6: Select the Installment Date.
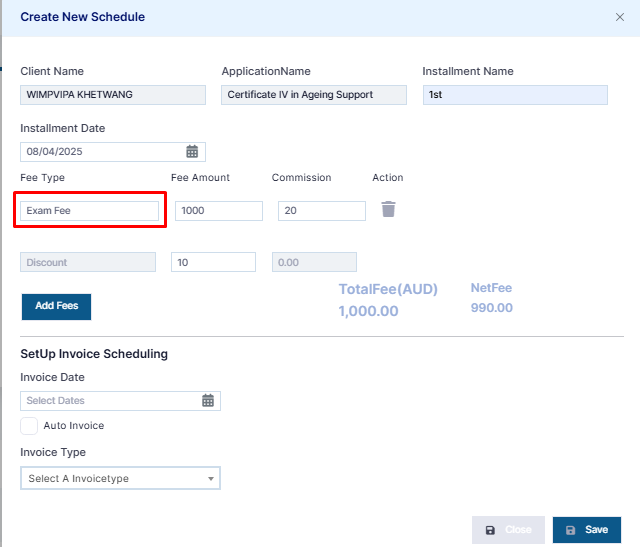
Step 7: Select the Fee Type.
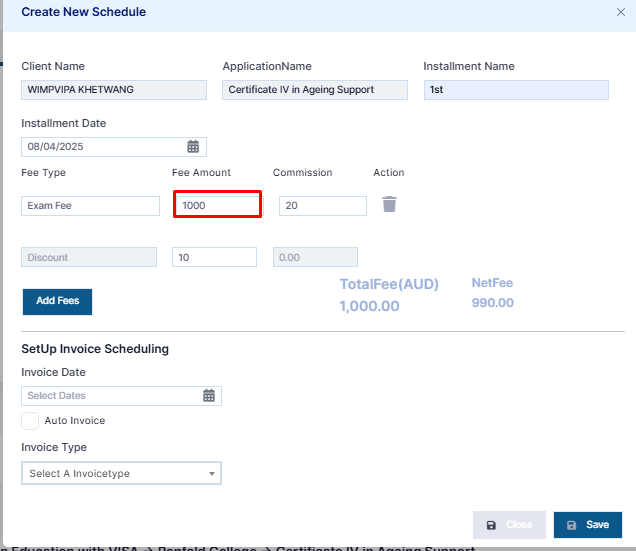
Step 8: Enter the Fee Amount.
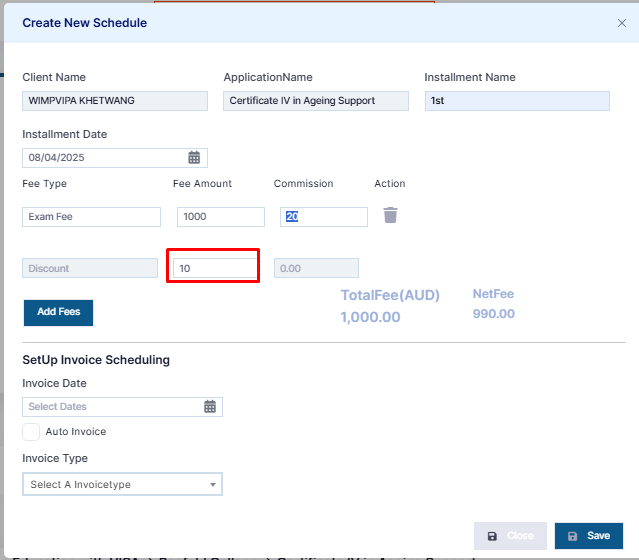
Step 9: Add a Discount Amount if applicable.
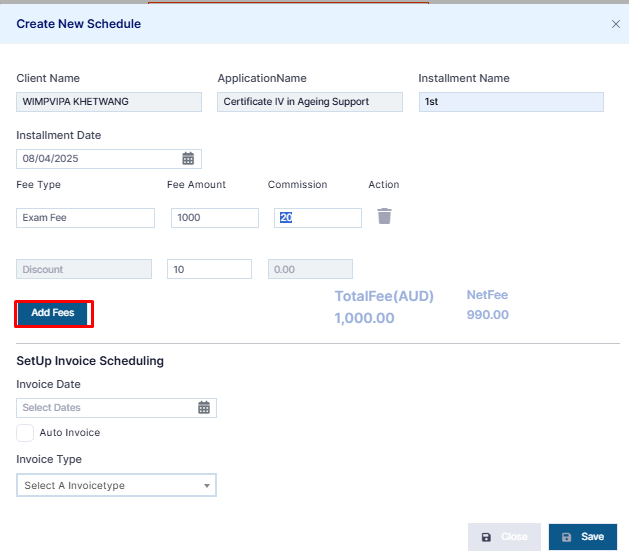
Step 10: To add more lines of Fee Type, click on the Add Fee tab.
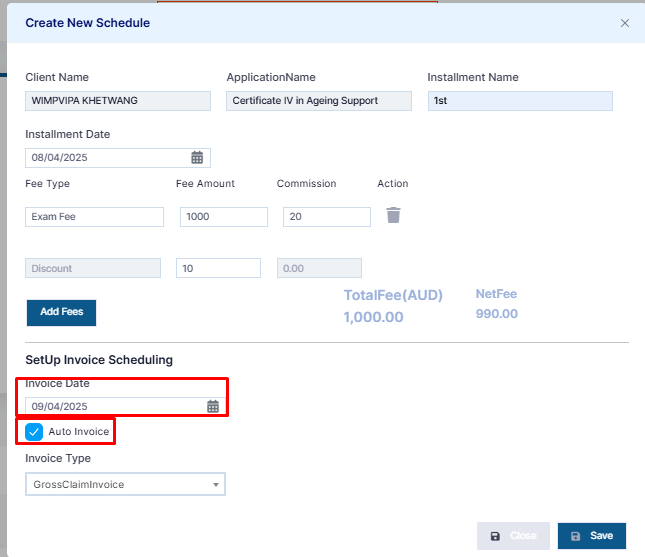
Step 11: For Auto Invoicing, select the Invoice Date.
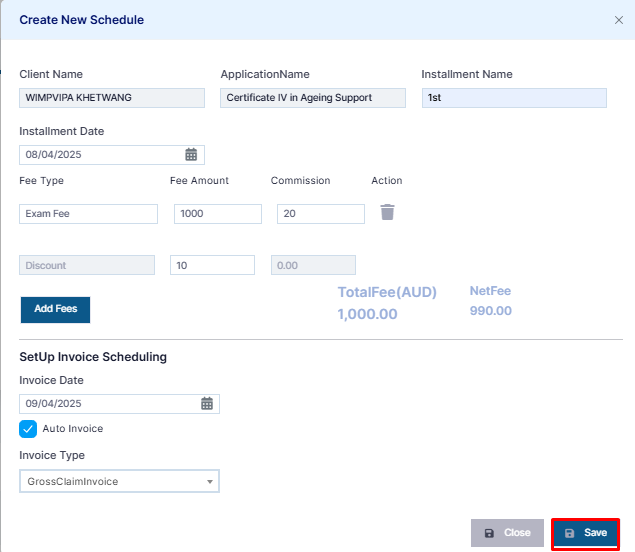
Step 12: Click Save to finalize the schedule.