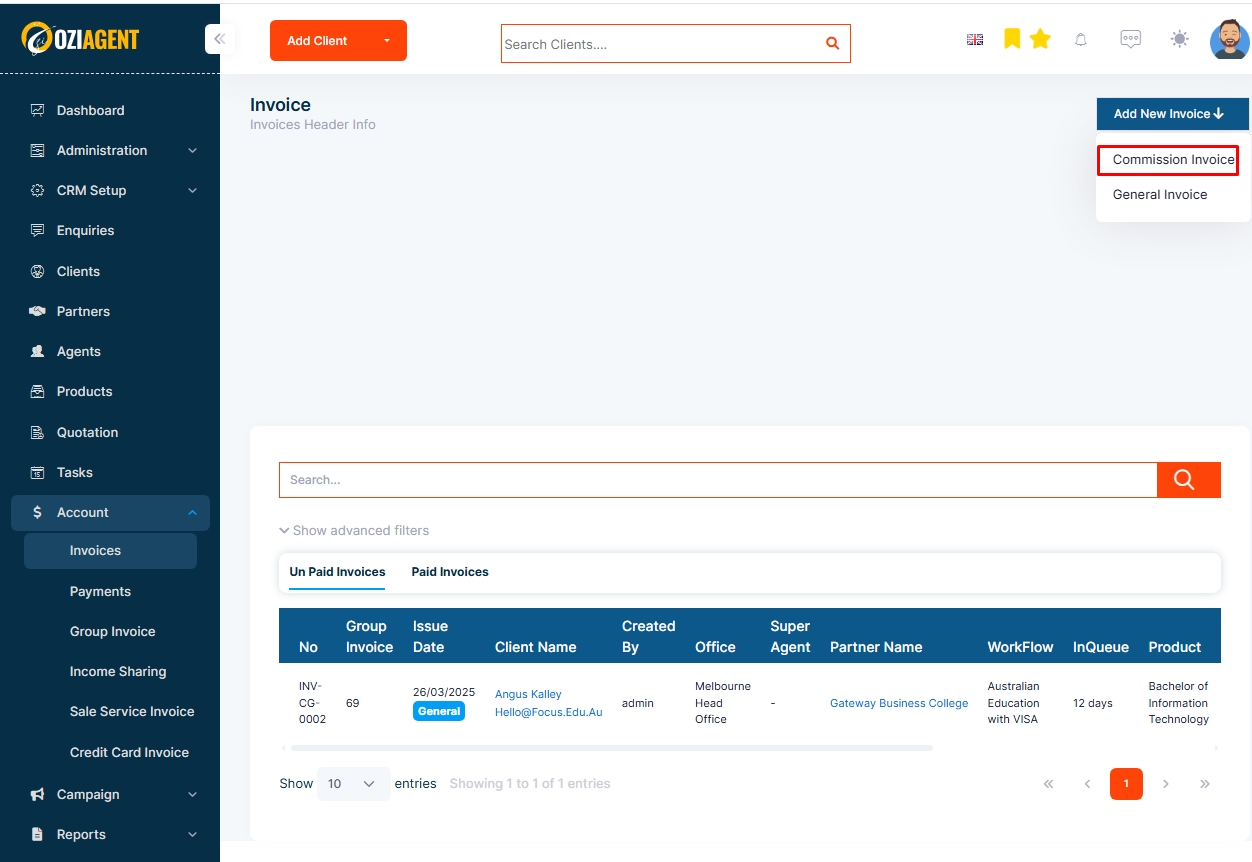
Step 1: Select Accounts from the Side navigation bar and then select Invoices.
Step 2: Select Create Invoice on the top right corner.
Step 3: Select Commission Invoice from the dropdown.
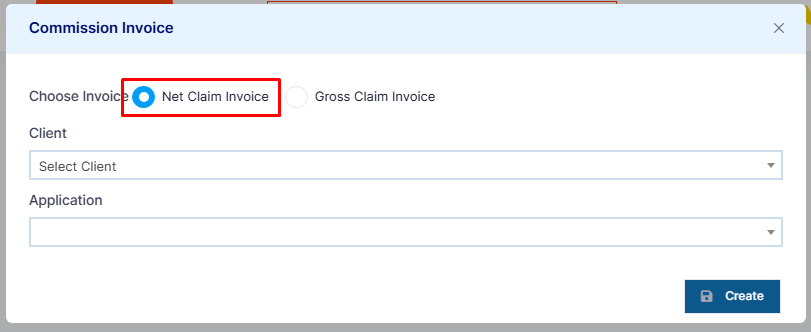
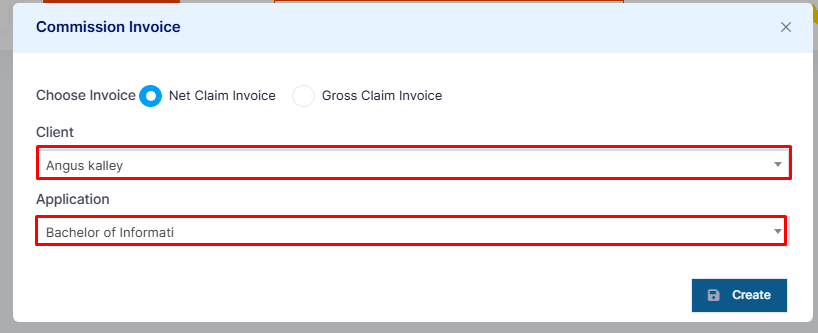
Step 4: In the pop-up form, select Net Claim Invoice.
Step 5: Select the client and application for which you want to create the invoice.
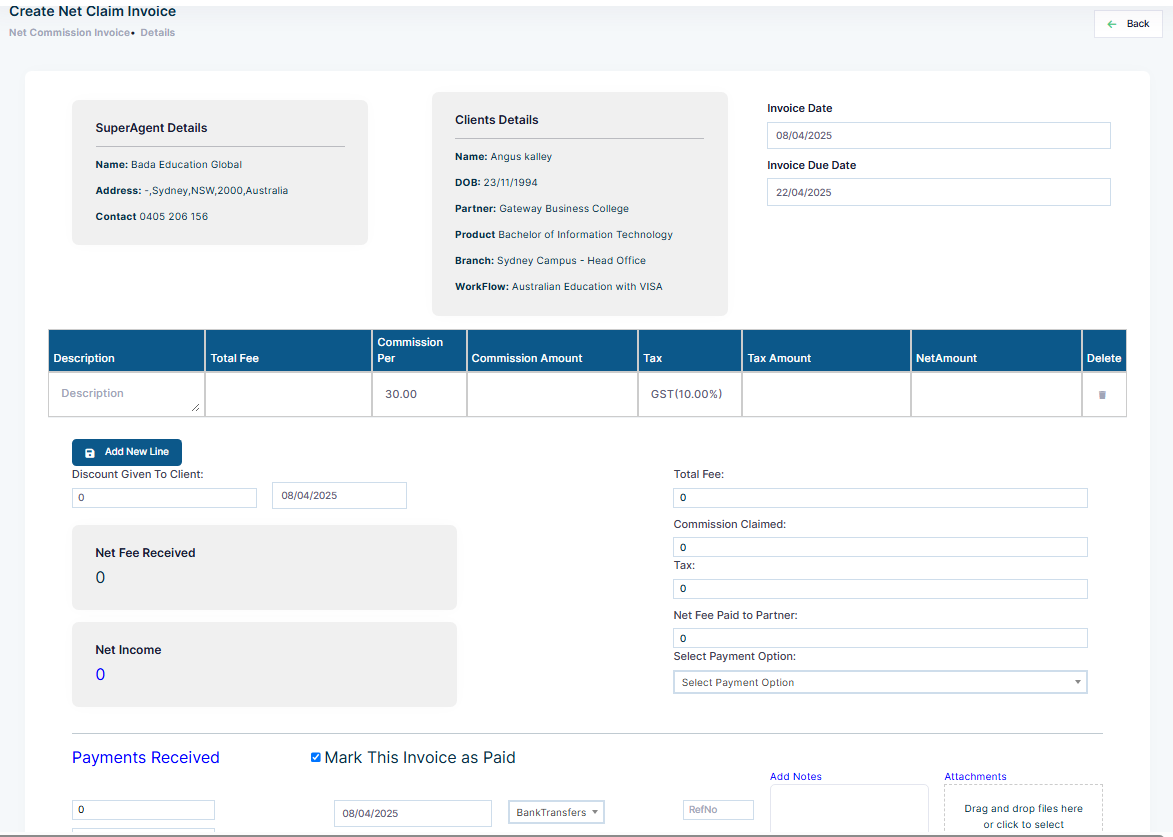
Step 6: Fill in the necessary details regarding the net commission.
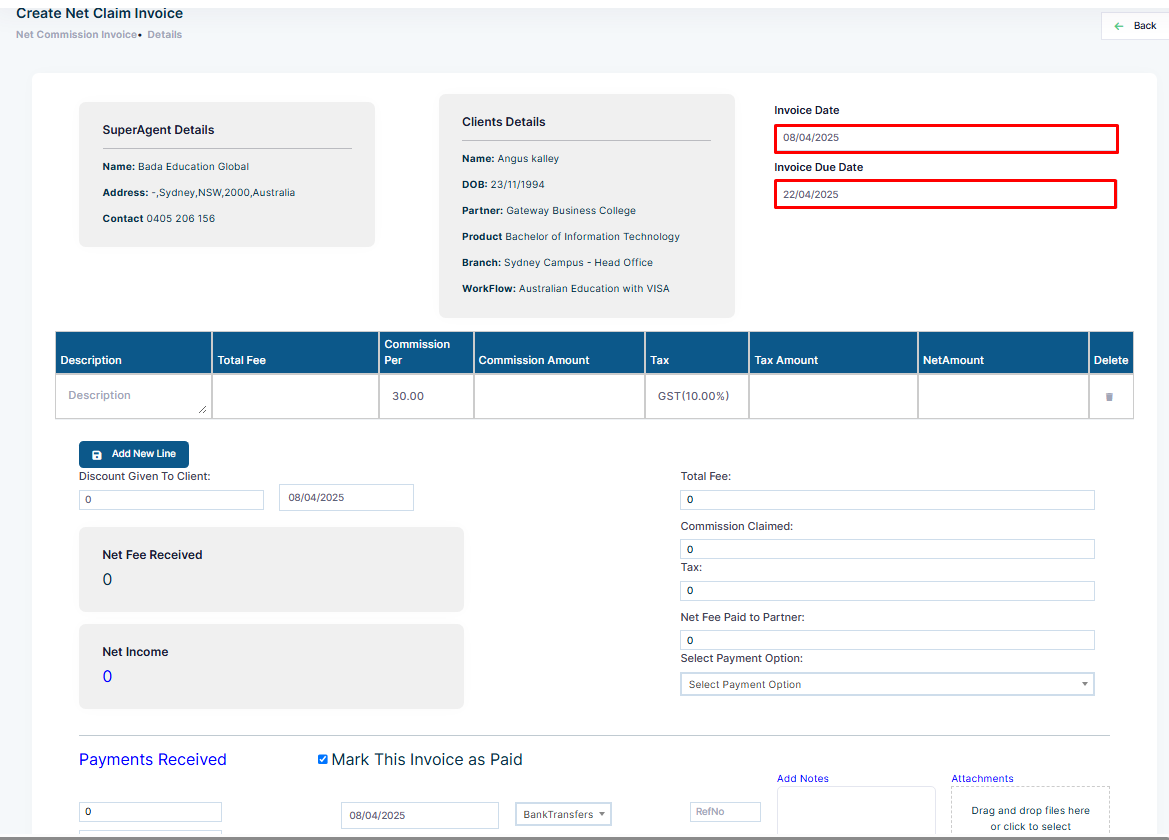
Step 7: Choose the invoice date and due date.
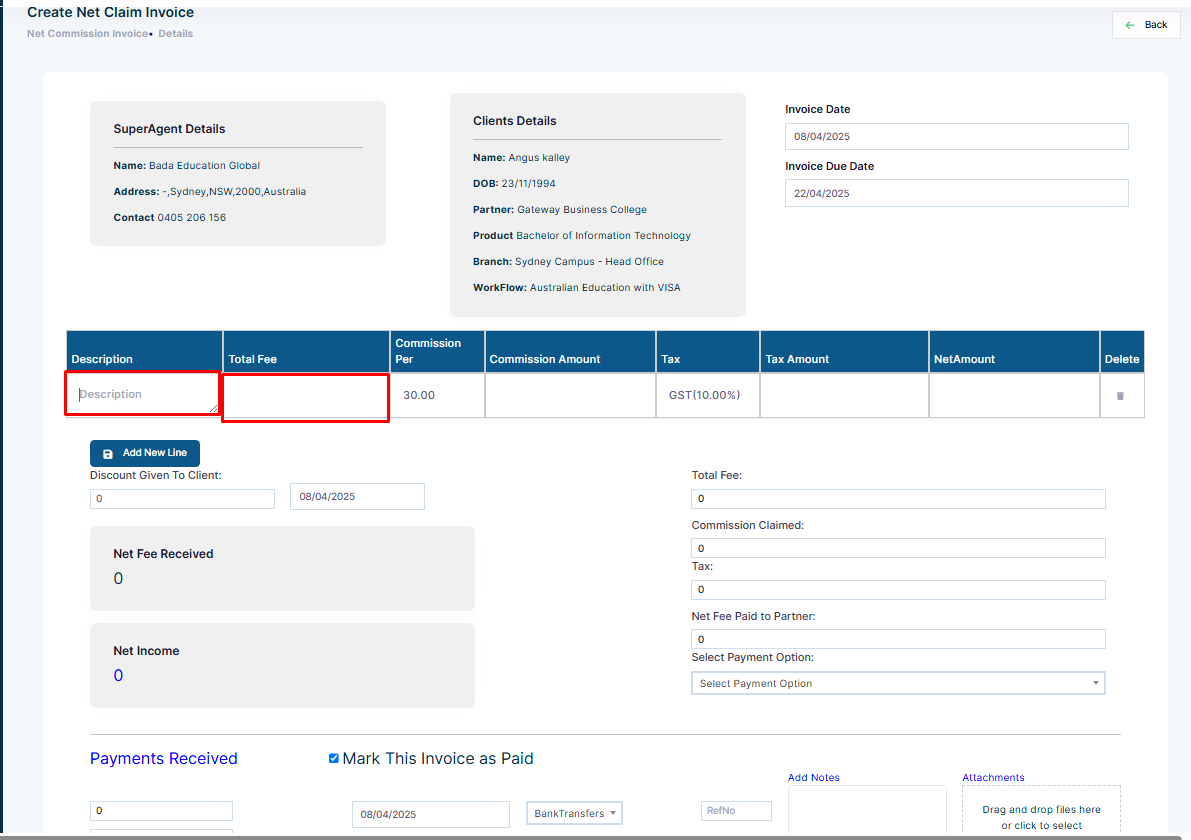
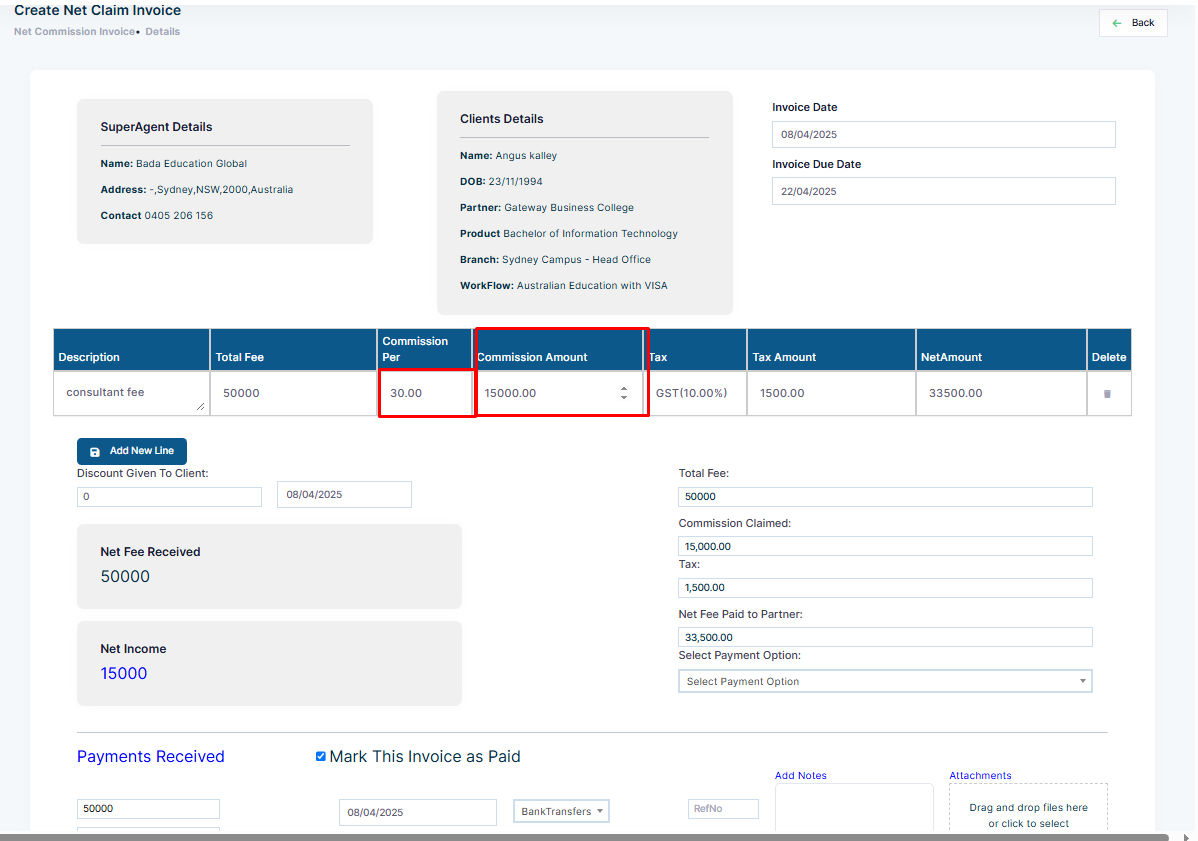
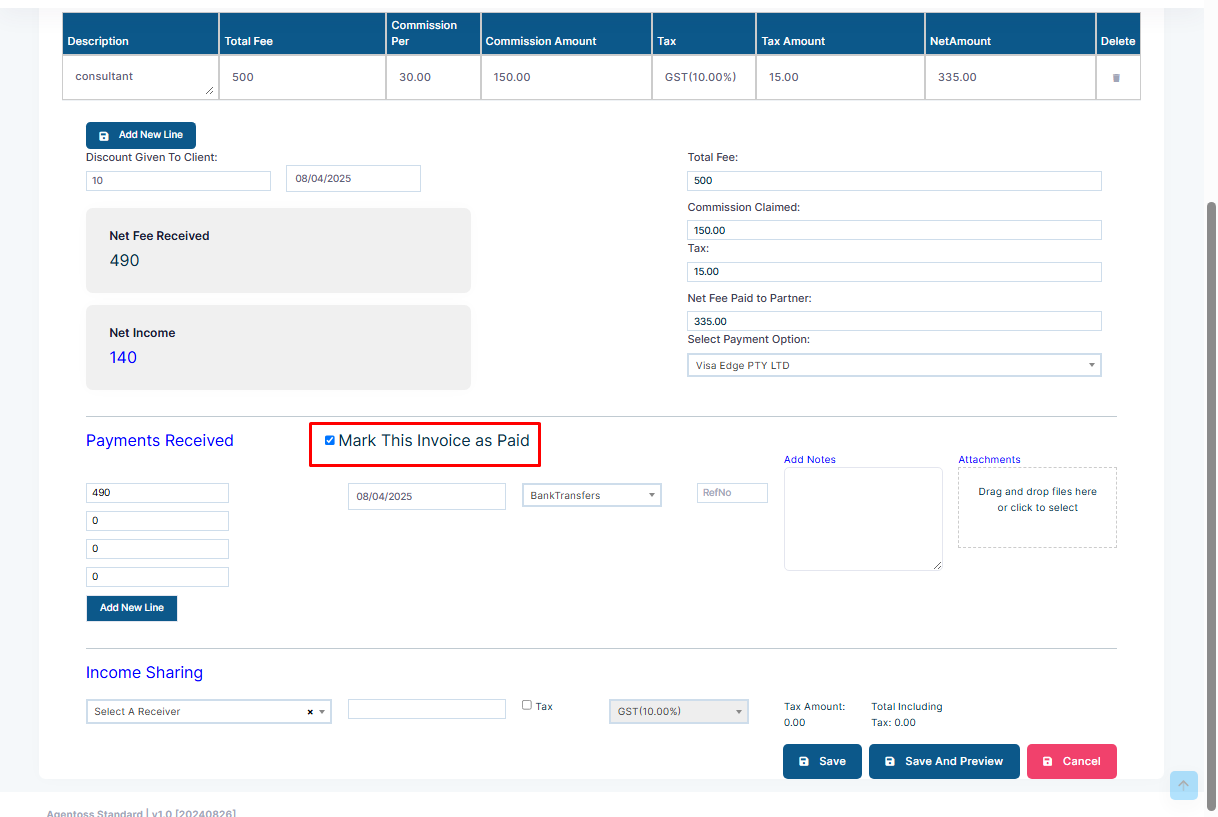
Step 8: Fill the description for the commission and add the total fee.
Step 9: The system will automatically calculate the commission amount based on the partner’s percentage.
Note: The commission percentage can be set under the partner agreement section or manually added.
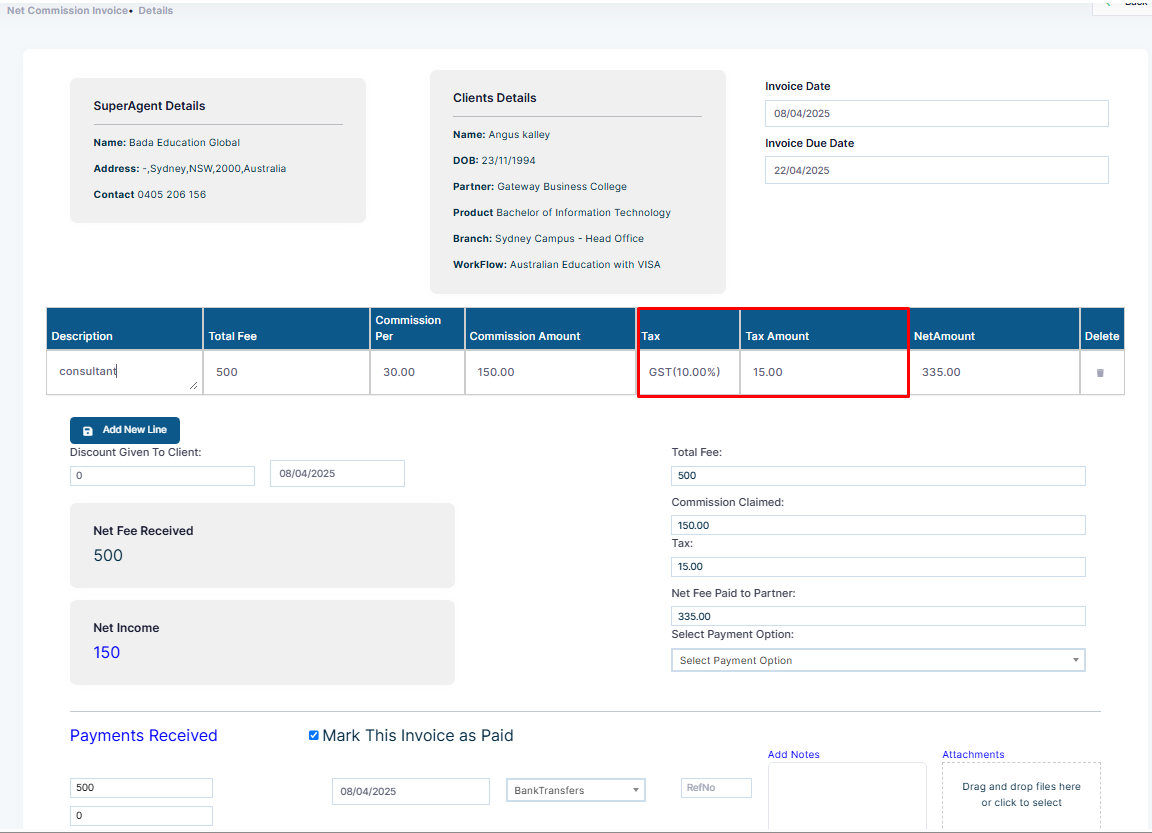
Step 10: Select the tax code, and the system will calculate the tax amount and net amount.
Note: Tax codes can be set from Account settings.
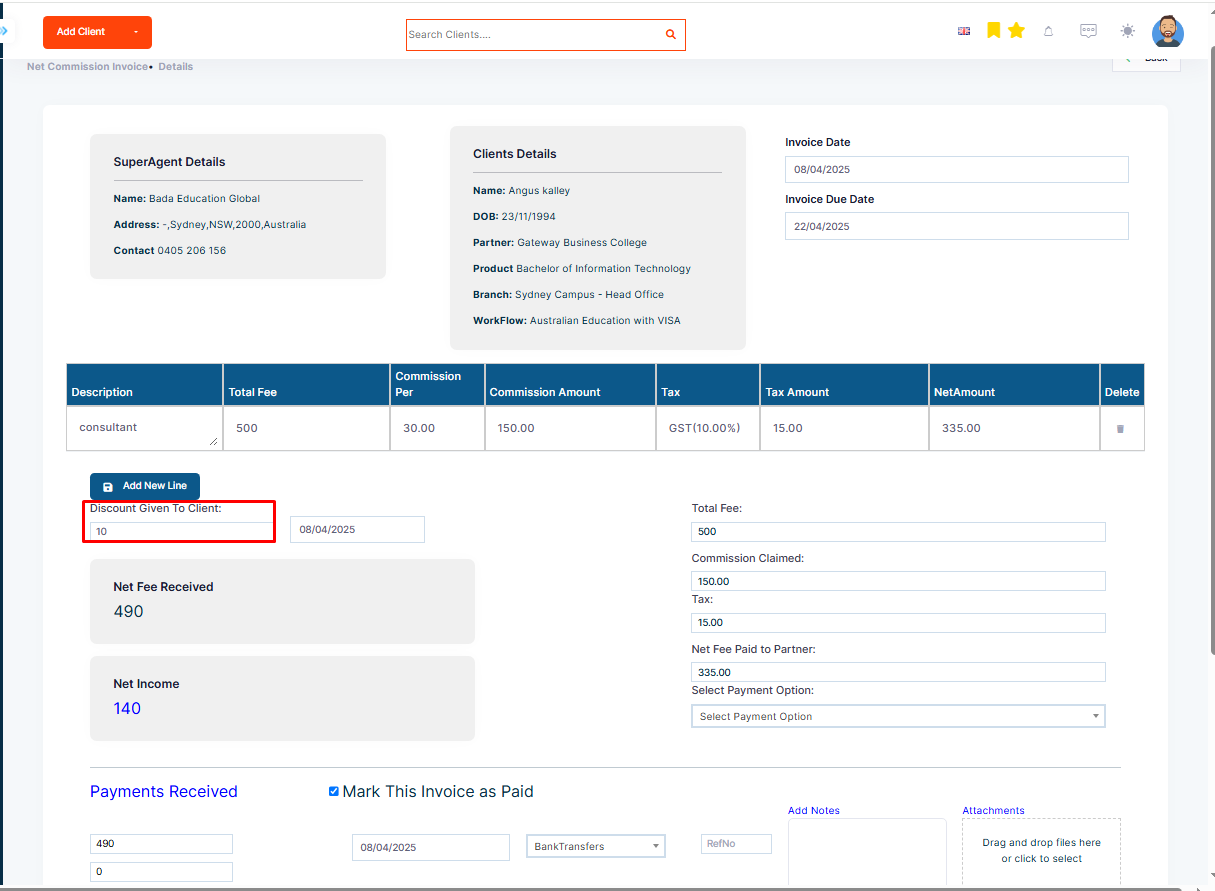
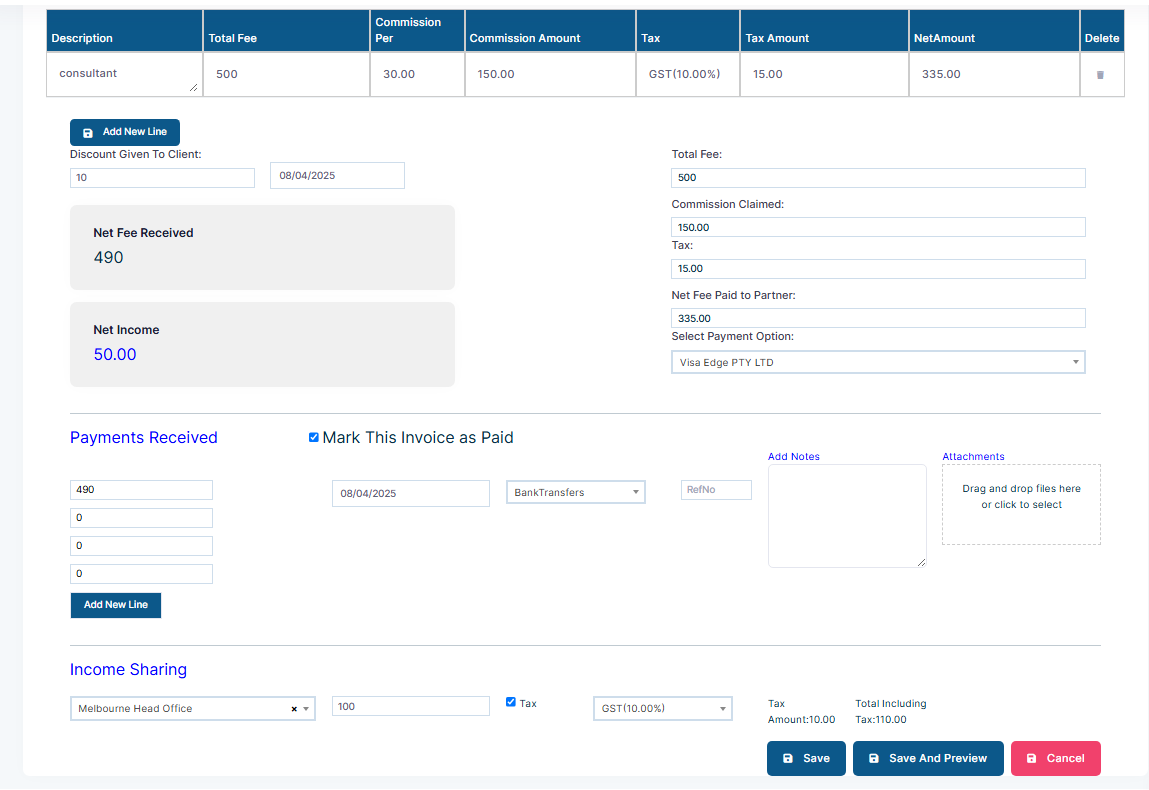
Step 11: If a discount is given to the client, fill in the details under the Discount Given to Client section.
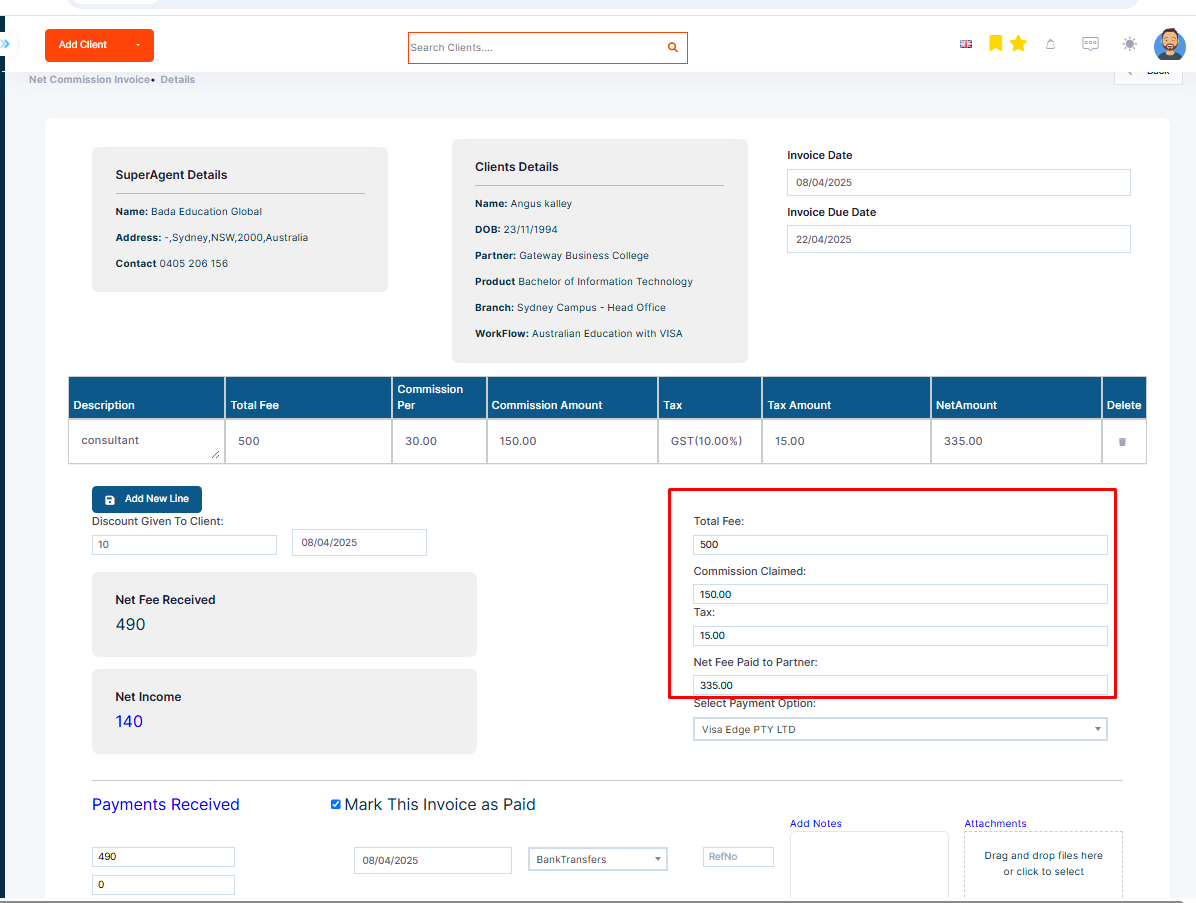
Step 12: View the summary of the invoice on the right side.
Step 13: Select the payment option to be included in the invoice.
Note: This is based on the payment details added in account settings.
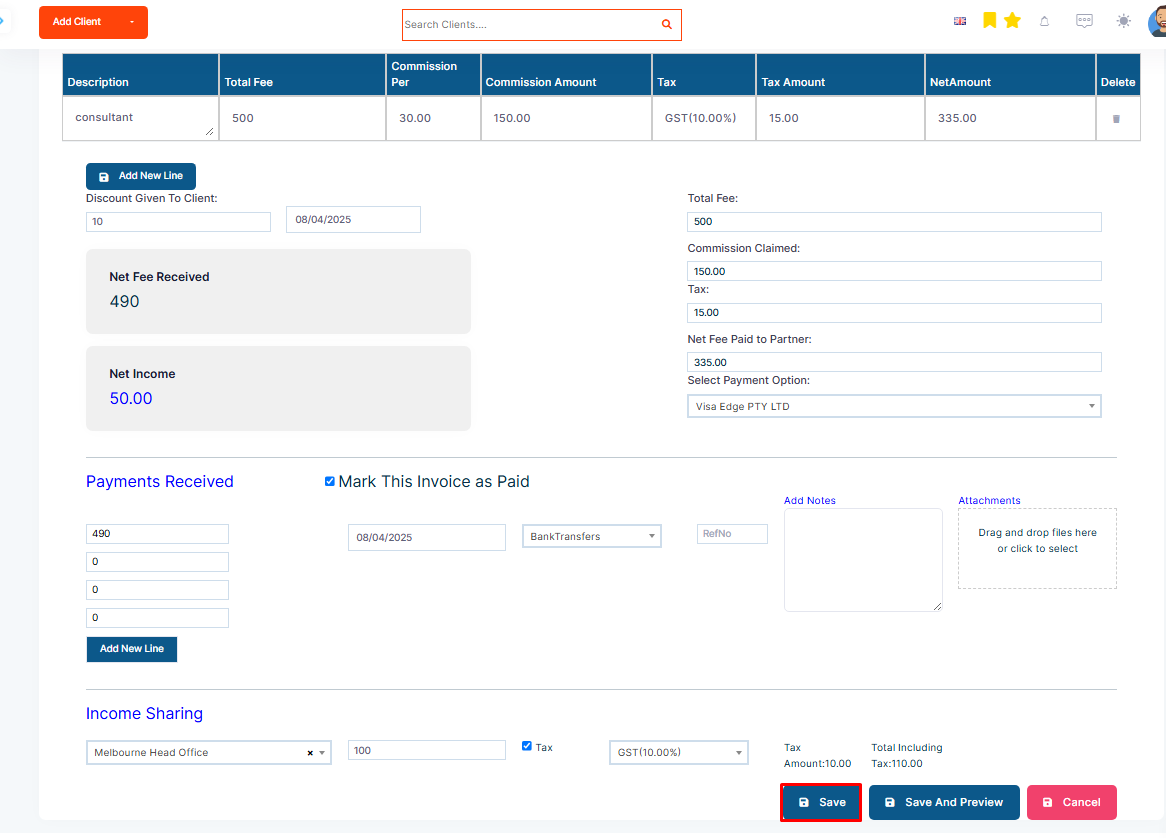
Step 14: In the payment received section, mark the invoice as paid or enter a partial payment.
Step 15: Use the income-sharing section to allocate the commission amount to another branch or sub-agent.
Step 16: Once all details are added, click Save to finalize the invoice.